Canvas Modes
Canvelete provides two primary canvas modes to suit different design workflows: Free Mode and Layout Mode. Each mode offers distinct capabilities for organizing and positioning elements on your canvas.
Free Mode
Free Mode provides unrestricted freedom for placing and transforming elements on the canvas. This mode is ideal for creative, freeform design work where you need complete control over element positioning without any constraints.
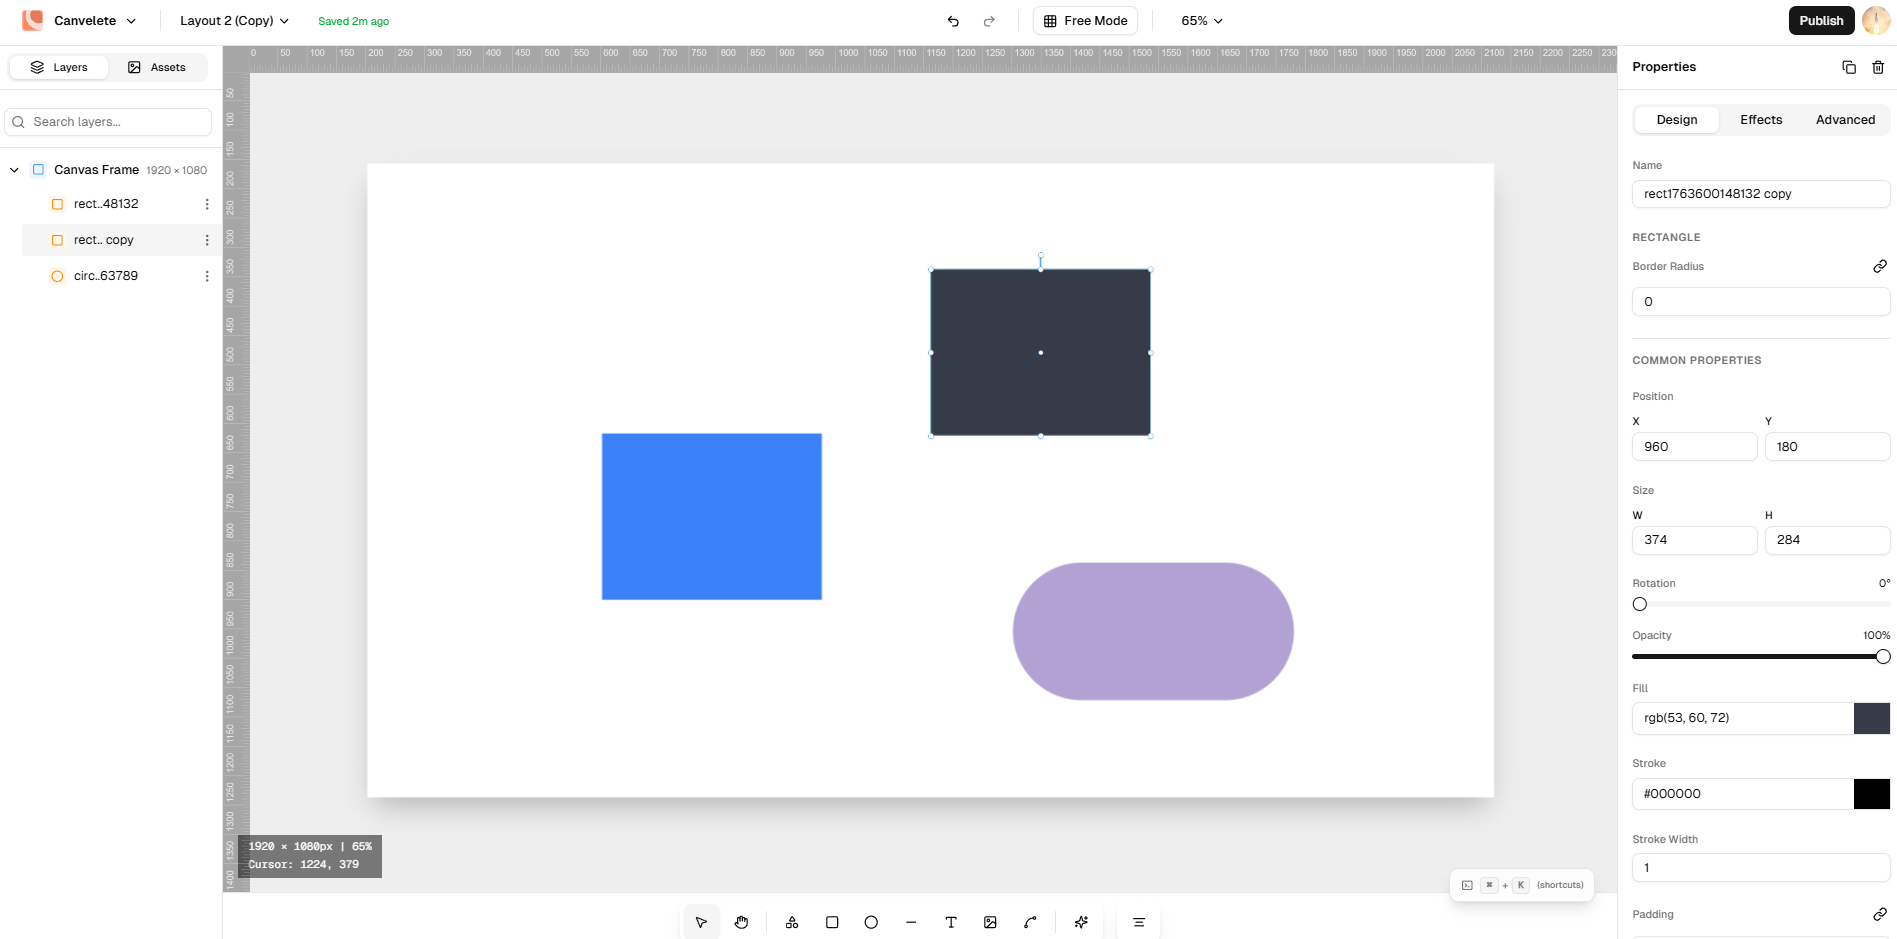
Features
- Free Transform: Place elements anywhere on the canvas without restrictions
- No Grid Constraints: Move, resize, and rotate elements with complete freedom
- Flexible Positioning: Perfect for organic layouts and creative compositions
When to Use Free Mode
- Creating artistic or freeform designs
- Working on layouts that don't require strict alignment
- Quick sketching and ideation
- Designs where pixel-perfect positioning isn't critical
Layout Mode
Layout Mode introduces structured design capabilities with two powerful sub-modes: Container Mode and Table Mode. This mode is designed for precise, grid-based layouts and structured content organization.
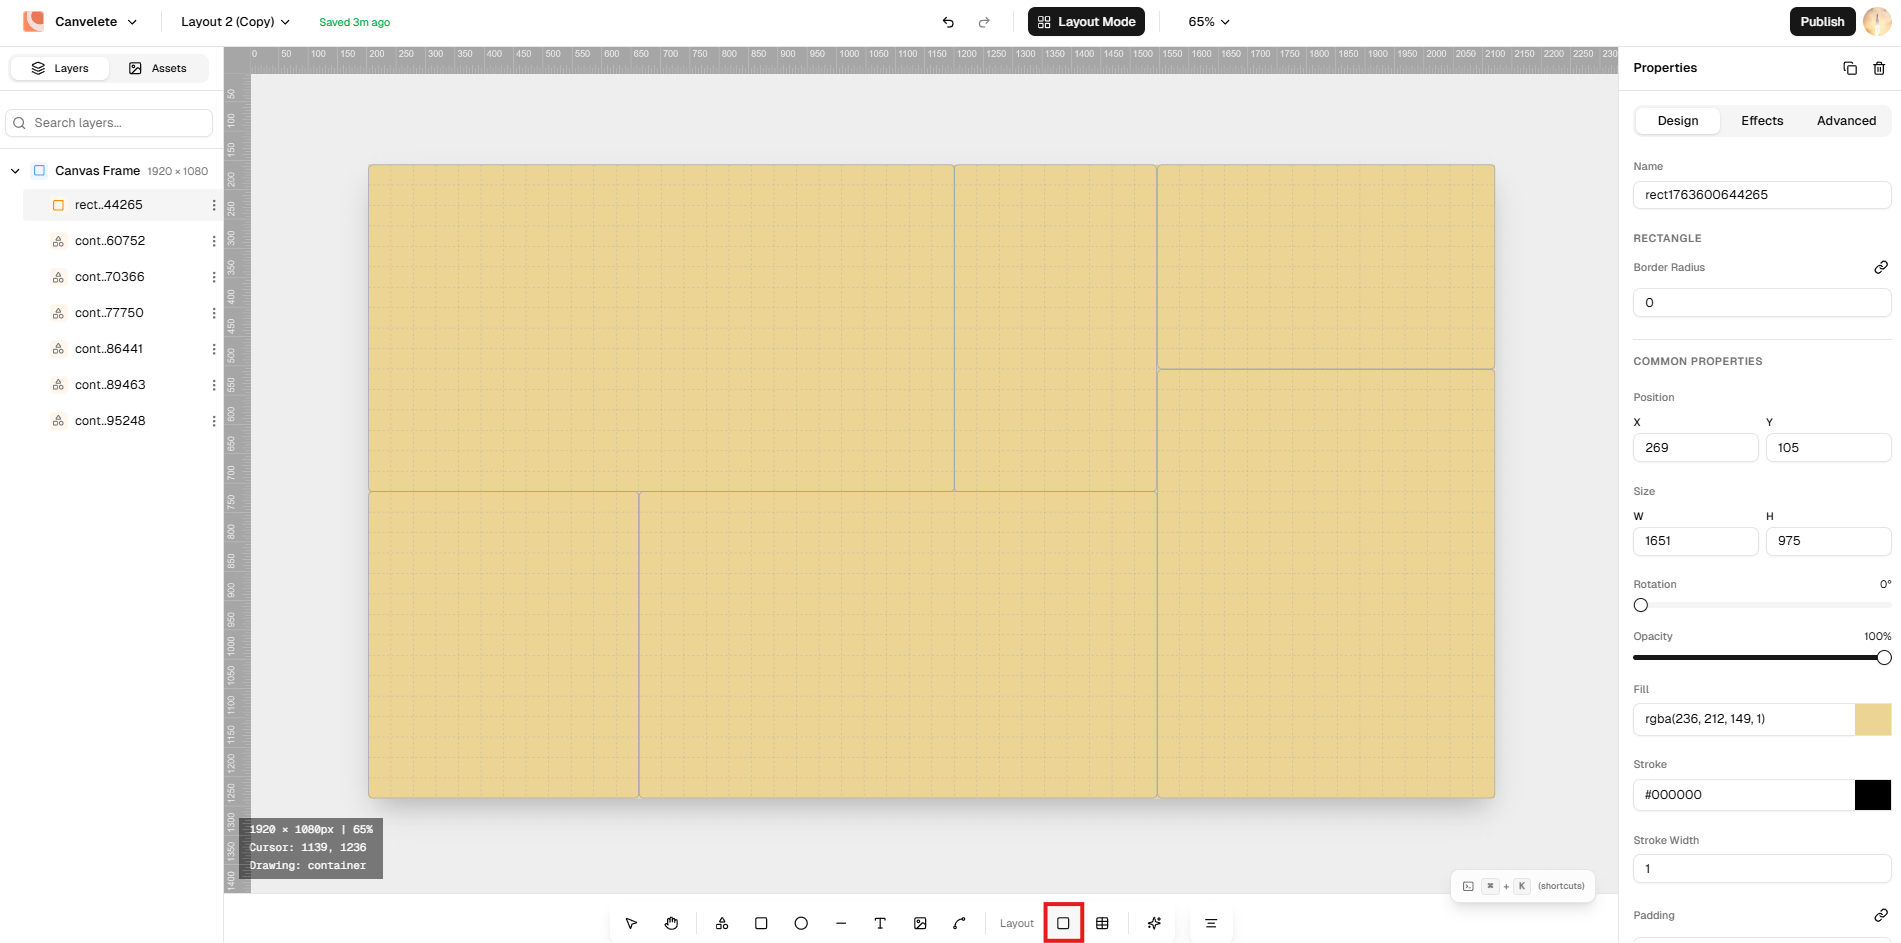
Container Mode
Container Mode enables you to create a box-like grid system that serves as a visual guide for element placement. Elements automatically snap to the grid, ensuring consistent spacing and alignment throughout your design.
Key Features
- Grid Lines Visible: Dashed grid lines provide visual guidance
- Active Grid Lines Turn Blue: Selected grid cells highlight in blue for better visibility
- Aggressive Snap to Grid: Elements automatically align to grid boundaries
- No Element Rotation: Maintains structured, orthogonal layouts
Grid Settings
- Rows: Adjust the number of horizontal divisions (default: 31)
- Columns: Adjust the number of vertical divisions (default: 50)
Use Cases
- Responsive web layouts
- Dashboard designs
- UI component libraries
- Structured content pages
- Form layouts
How to Use Container Mode
- Switch to Layout Mode from the canvas toolbar
- Adjust the grid settings using the Rows and Columns sliders
- Draw elements on the canvas - they will automatically snap to the grid
- Grid lines turn blue when elements are positioned over them
- Use the grid as a guide for consistent spacing and alignment
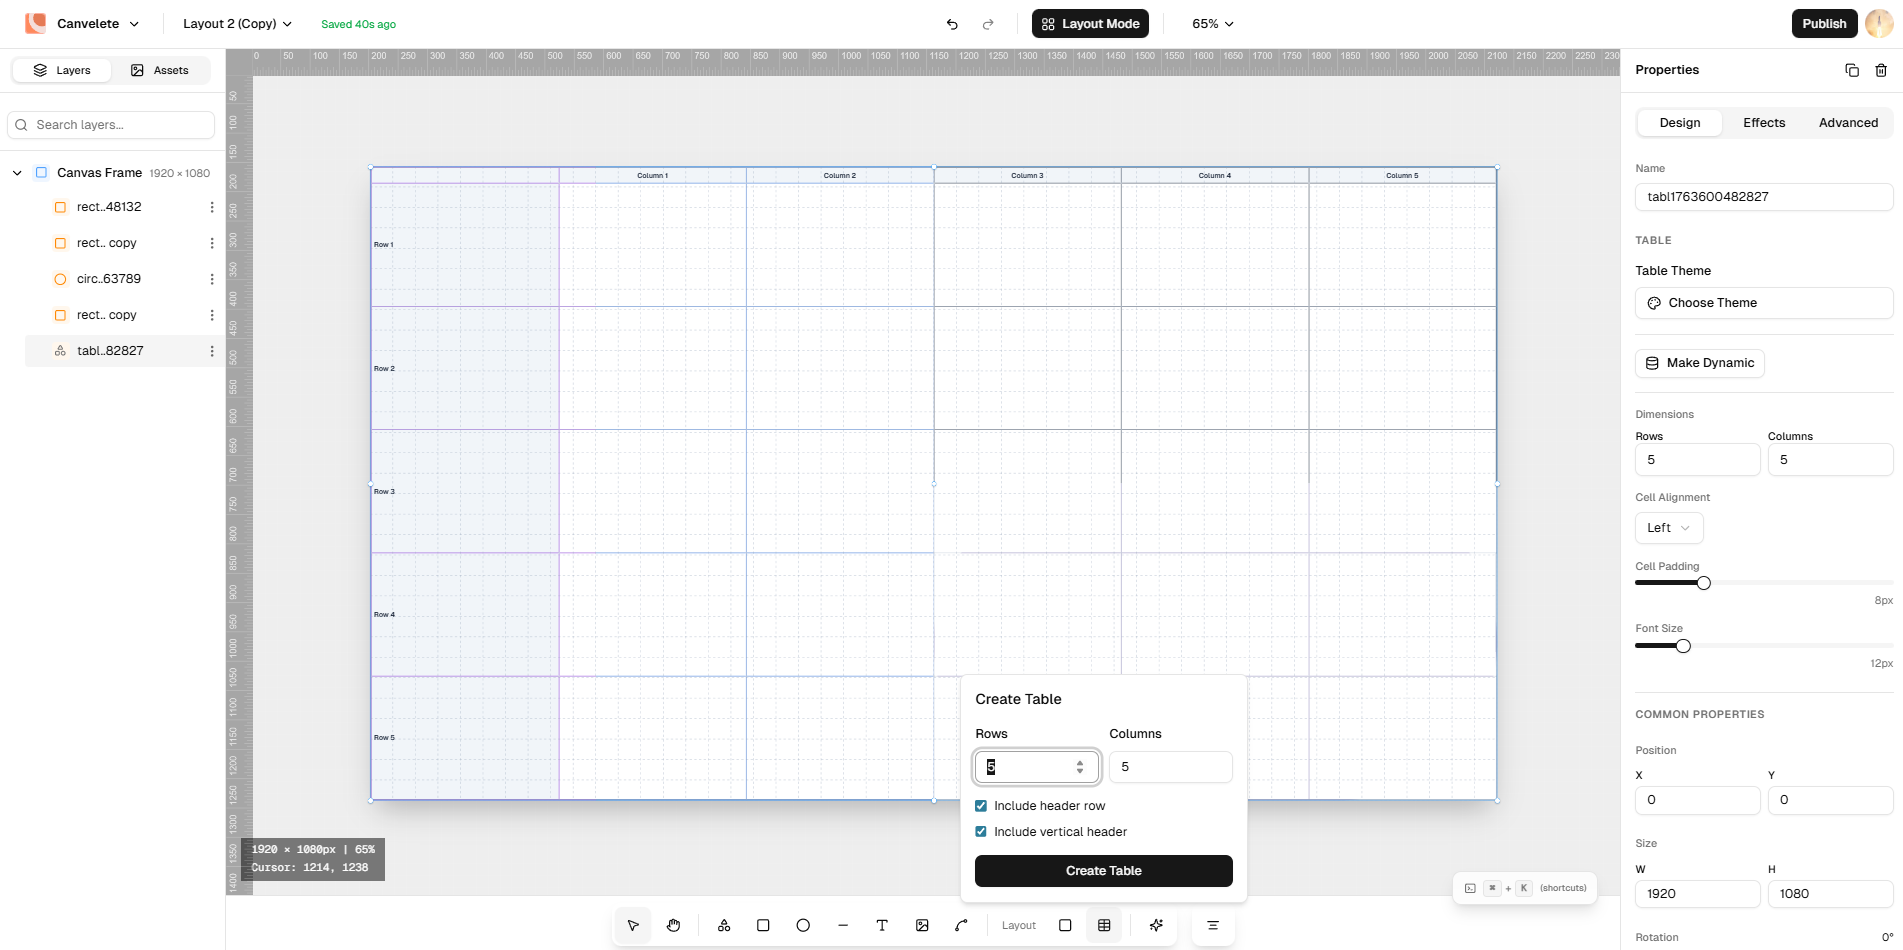
Table Mode
Table Mode allows you to create and manage tabular layouts directly on the canvas. This mode is specifically designed for working with data tables and grid-based content structures.
Key Features
- Column Headers: Create labeled columns for organized data presentation
- Row Management: Add, remove, and organize rows efficiently
- Cell-Based Layout: Work with individual cells for precise content placement
- Table Structure: Maintain consistent table formatting throughout
Use Cases
- Data tables and spreadsheets
- Pricing comparison tables
- Feature matrices
- Calendars and schedules
- Structured data visualization
How to Use Table Mode
- Switch to Layout Mode from the canvas toolbar
- Select Table Mode
- Click and drag to create a table structure
- Define columns and rows based on your needs
- Populate cells with content
- Adjust table properties as needed
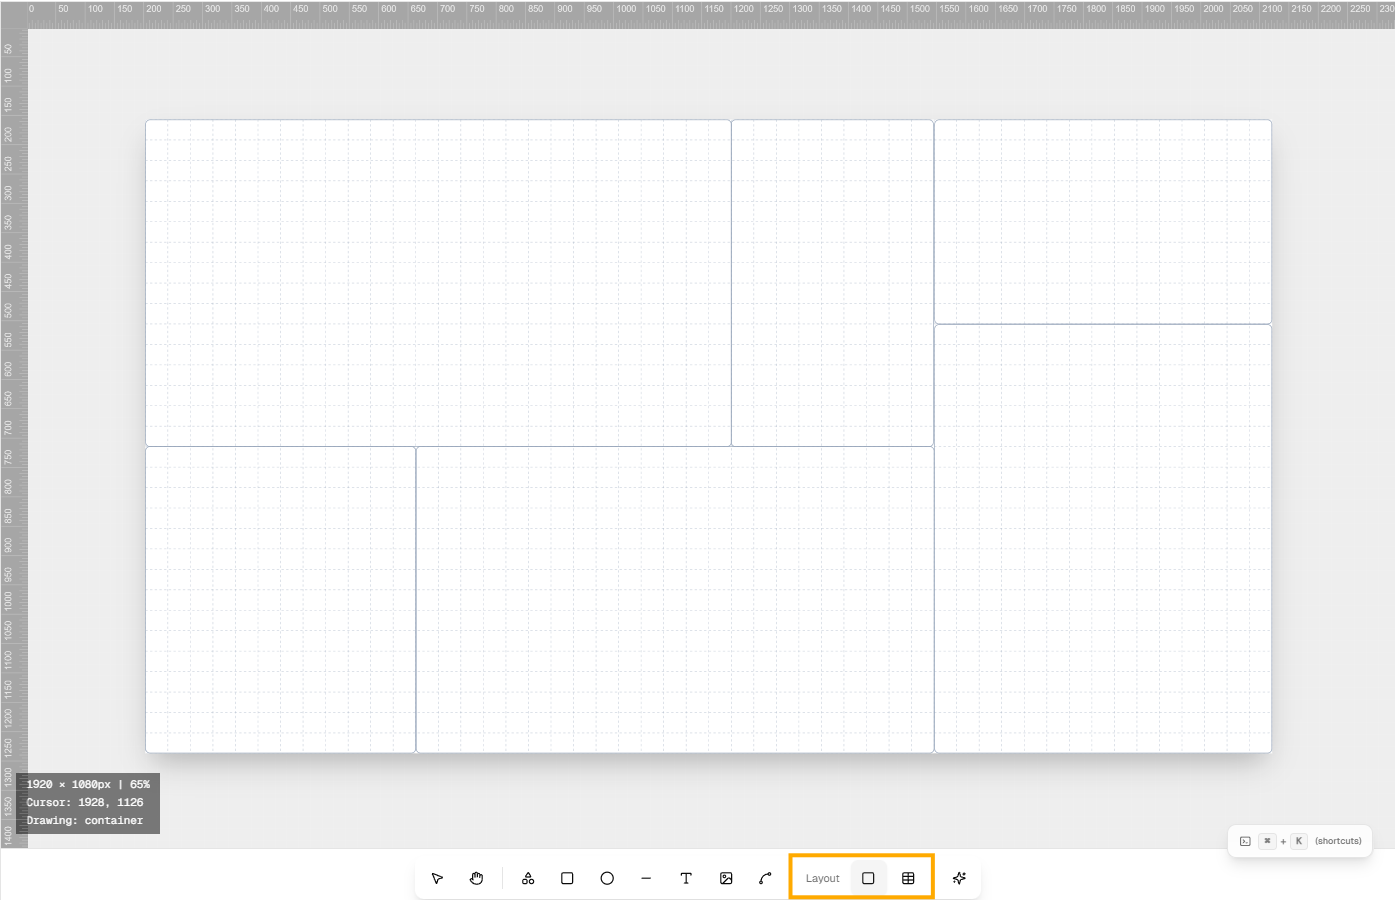
Switching Between Modes
You can easily switch between Free Mode and Layout Mode using the canvas mode toggle in the toolbar:
- Click the Free Mode button for unrestricted design
- Click the Layout Mode button to access Container and Table modes
The mode selector is prominently displayed at the bottom of the canvas interface, allowing for quick switching as your design needs change.